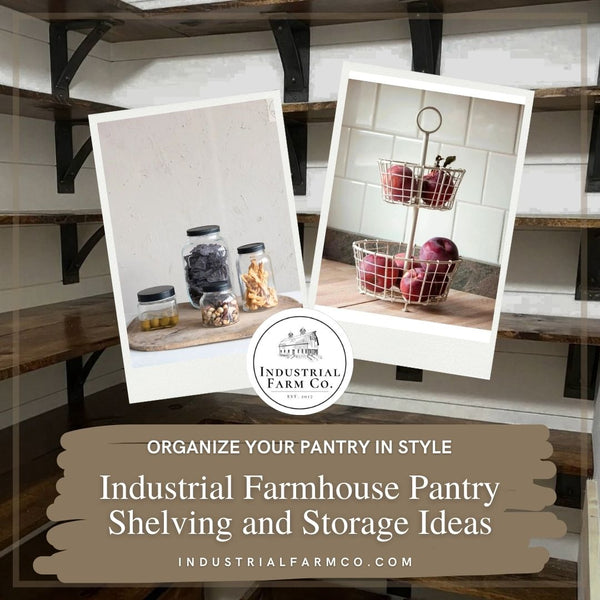
8,000+ Five-Star Reviews
Handcrafted in New York
Real American Steel
Ships in 7 - 10 Days

Open shelving has transformed from a practical storage solution into one of the most sought-after design elements in modern homes.
Open shelving installation has become the fastest-growing home improvement trend, increasing property values by up to 8% while maximizing storage efficiency. This comprehensive guide covers everything from selecting the right industrial shelf brackets to professional installation techniques and long-term maintenance strategies.
Why Open Shelving Transforms Modern Homes
Open shelving installation offers the perfect combination of functional storage and contemporary design aesthetics. Unlike traditional closed cabinets, floating shelves with industrial brackets create visual spaciousness while providing easily accessible storage for everyday items and decorative displays.
Key Benefits of Open Shelving Systems:
- Space Enhancement: Creates an illusion of larger rooms through visual continuity
- Cost Efficiency: 60% less expensive than custom cabinetry installation
- Accessibility: Instant access to frequently used items without opening doors
- Design Flexibility: Easy to reconfigure and restyle as needs change
- Property Value: Increases home resale value through modern storage solutions
According to the National Association of Home Builders, homes featuring well-designed open shelving systems sell 23% faster than comparable properties with only traditional storage options.
Industrial-style shelf brackets have become the preferred choice for homeowners seeking both durability and aesthetic appeal. These heavy-duty shelf supports complement a range of design styles, from modern farmhouse to urban industrial, making them versatile solutions for any home improvement project.
Pre-Installation Planning: Measuring, Materials, and Wall Assessment
Successful open shelving installation begins with thorough planning and accurate measurements. This preliminary phase prevents costly mistakes and ensures professional-quality results.
Wall Type Assessment and Load Requirements
Drywall Installation Considerations:
- Standard 1/2" drywall requires wall anchors for loads over 20 pounds per bracket
- Locate wall studs every 16" or 24" for maximum support capacity
- Use electronic stud finders for accuracy in older homes with irregular framing
Plaster Wall Modifications:
- Pre-drill pilot holes to prevent cracking during bracket installation
- Use specialized plaster anchors for hollow sections between lath strips
- Consider a professional assessment for walls over 50 years old
Masonry and Tile Installation:
- Requires masonry drill bits and specialized concrete anchors
- Plan for a longer installation time due to material hardness
- Use dust collection during drilling to maintain a clean work environment
Space Measurement and Bracket Spacing Calculations
Standard Bracket Spacing Guidelines:
- Light loads (under 25 lbs): 32" maximum spacing between brackets
- Medium loads (25-50 lbs): 24" maximum spacing for optimal support
- Heavy loads (over 50 lbs): 16-20" spacing with reinforced wall attachment
Shelf Depth and Bracket Selection:
- Brackets should extend to at least 75% of shelf depth for stability
- Add 2" minimum clearance behind shelves for easy cleaning access
- Consider 12-15" depth for book storage, 8-10" for decorative displays
Utility Line Detection and Safety Protocols
Before beginning any wall modification, use a multi-sensor wall scanner to detect:
- Electrical wiring and outlets
- Plumbing lines and water pipes
- HVAC ducts and gas lines
- Cable and internet wiring
Professional Tip: Contact your local utility marking service (811) for complex installations near exterior walls where utility lines may enter the home.
Industrial Bracket Selection Guide: Types, Load Capacity, and Finishes
Choosing the right industrial shelf brackets determines both the functionality and aesthetic success of your open shelving project. Industrial Farm Co offers several bracket styles engineered for different applications and weight requirements.
Heavy-Duty Bracket Styles and Applications
The Lucas L Bracket - Minimalist Design Excellence
- Load Capacity: Up to 45 pounds per pair when properly installed
- Best Applications: Modern kitchens, home offices, living room displays
- Aesthetic Profile: Clean lines complement contemporary and transitional décor
- Starting Price: $10.50 per bracket

The Glimmerglass J Shelf Bracket - Floating Shelf Illusion
- Load Capacity: Up to 60 pounds per pair with stud mounting
- Best Applications: Statement shelves, art displays, bathroom storage
- Aesthetic Profile: J-hook design creates minimal visual impact while providing substantial support
- Unique Feature: Hidden mounting system for a clean, floating appearance

The Jane J Style Shelf Brackets - Compact Versatility
- Load Capacity: Up to 35 pounds per pair for lighter applications
- Best Applications: Bathroom accessories, small decorative shelves, bedroom organization
- Aesthetic Profile: Smaller profile maintains clean lines in compact spaces
- Budget-Friendly Option: Ideal for multi-shelf installations

The Seneca Shelf Support - Maximum Strength Engineering
- Load Capacity: Up to 80 pounds per pair with proper installation
- Best Applications: Kitchen appliance storage, heavy book collections, workshop organization
- Aesthetic Profile: Angular design with multiple support points for industrial strength
- Professional Grade: Preferred by contractors for commercial applications

Finish Options and Durability Considerations

Matte Black Powder Coating:
- Most versatile finish, complementing 90% of interior design styles
- Scratch-resistant and easy to clean with standard household cleaners
- UV-resistant properties prevent fading in rooms with direct sunlight
- Recommended for high-traffic areas like kitchens and family rooms
Raw Steel with Clear Protective Coating:
- Develops natural patina over time for authentic industrial character
- Requires periodic maintenance with furniture wax or steel conditioner
- Ideal for rustic, farmhouse, and industrial design aesthetics
- Not recommended for high-humidity environments like bathrooms
Custom Color Matching:
- Available for orders over 10 brackets to match existing hardware
- 4-week lead time for custom powder coating applications
- Perfect for designers and contractors with specific color requirements
- Includes color sample approval process for exact matching
Weight Capacity Engineering and Safety Factors
Industrial Farm Co. brackets undergo rigorous testing to ensure safety margins exceed stated capacities:
Testing Protocol Standards:
- All brackets tested to 3x stated capacity for safety margin
- Dynamic load testing simulates real-world usage patterns
- Fatigue testing over 10,000 load cycles ensures long-term reliability
- Third-party certification through structural engineering firms
Installation Method Impact on Capacity:
- Stud mounting: Achieves full rated capacity
- Drywall anchors: Reduce capacity by approximately 40%
- Masonry mounting: May exceed rated capacity with proper anchors
- Hollow wall mounting: Requires load redistribution across multiple anchors
Essential Tools and Materials for Professional Installation
Proper tool selection significantly impacts installation speed, accuracy, and final appearance. Professional contractors recommend investing in quality tools for any open shelving project involving more than 2-3 shelves.
Must-Have Installation Tools
Measurement and Layout Tools:
- 48" Professional Level: Ensures accurate horizontal alignment across multiple brackets
- Electronic Stud Finder: Multi-sensor models detect wood studs, metal, and electrical lines
- Laser Level: Essential for installing multiple shelf heights with perfect alignment
- Steel Tape Measure: 25' minimum length for room-scale measurements
- Awl or Sharp Pencil: For precise marking without permanent marks
Power Tools and Hardware:
- Corded Drill: More consistent power than battery models for masonry work
- Drill Bit Set: Include wood bits, masonry bits, and countersink bits
- Impact Driver: Faster installation and better torque control for screws
- Oscillating Multi-Tool: Helpful for cutting drywall or making precise modifications
Specialized Mounting Hardware:
- Toggle Bolts: For hollow drywall areas without stud backing
- Masonry Anchors: Wedge or sleeve anchors for concrete and brick walls
- Wood Screws: 3" length minimum for secure stud attachment
- Washers: Distribute load and prevent bracket deformation under weight
Material Selection for Shelf Construction
Solid Wood Options:
- Hard Maple: Excellent strength-to-weight ratio, takes stain beautifully
- White Oak: Classic choice with prominent grain pattern and natural durability
- Walnut: Premium appearance with rich chocolate tones
- Reclaimed Wood: Environmentally conscious option with unique character
Engineered Materials:
- Plywood with Hardwood Veneer: Cost-effective with consistent quality
- Medium Density Fiberboard (MDF): Smooth surface ideal for painted finishes
- Bamboo: Sustainable option with natural antimicrobial properties
- Butcher Block: Food-safe choice for kitchen applications
Alternative Materials:
- Tempered Glass: Easy cleaning and modern aesthetic
- Stainless Steel: Commercial-grade durability for high-use areas
- Natural Stone: Marble or granite for luxury applications
- Industrial Pipe: Creates an industrial aesthetic with built-in brackets
Safety Equipment and Protective Gear
Personal Protective Equipment:
- Safety glasses are required during all drilling operations
- Dust masks when cutting or sanding wood materials
- Work gloves for handling rough materials and heavy shelves
- Knee pads for installations requiring floor-level work
Workspace Safety:
- Drop cloths to protect finished floors during installation
- Step ladder or scaffold for safe access to high installations
- First aid kit accessible during power tool operations
- Adequate lighting to ensure precise measurements and cuts
Step-by-Step Open Shelf Installation Process
This detailed installation process ensures professional results, whether you're installing a single shelf or a complete open shelving system. Follow each step carefully for optimal results and long-term durability.
Phase 1: Layout and Marking
Step 1: Wall Preparation and Stud Location
- Use an electronic stud finder to locate all wall studs in the installation area
- Mark stud locations with light pencil marks at desired shelf heights
- Verify stud locations by inserting a thin finish nail or a small drill bit
- Check for utilities using a multi-sensor detector before making any holes
Step 2: Shelf Height Determination and Marking
- Measure and mark the desired height for the bottom shelf using a laser level
- For multiple shelves, mark all heights simultaneously for consistency
- Use a 48" level to draw light horizontal lines at each shelf location
- Double-check measurements from the ceiling, floor, and adjacent features
Step 3: Bracket Position Layout
- Determine bracket spacing based on shelf length and load requirements
- Mark bracket positions on horizontal level lines
- Ensure bracket locations align with wall studs whenever possible
- For brackets between studs, mark locations for appropriate wall anchors
Phase 2: Bracket Installation
Step 4: First Bracket Installation (Reference Bracket)
- Position the bracket at the marked location and verify level alignment
- Mark screw hole locations with an awl or a sharp pencil
- Pre-drill pilot holes to prevent wood splitting or cracking
- Install the bracket using appropriate screws for the wall type
- Use the level to verify the bracket is perfectly horizontal before fully tightening
Step 5: Remaining Bracket Installation
- Measure the distance from the reference bracket to each additional bracket location
- Use a laser level or chalk line for consistent alignment across the wall
- Install each bracket following the same procedure as the reference bracket
- Check alignment between brackets using a straight edge or a level
Step 6: Load Testing and Adjustment
- Test each bracket with moderate weight before shelf installation
- Check all connections are tight and secure
- Verify no movement or flexing under load
- Make any necessary adjustments before proceeding to shelf installation
Phase 3: Shelf Preparation and Installation
Step 7: Shelf Material Preparation
- Cut shelf material to final dimensions if needed
- Sand all surfaces smooth, starting with coarse grit and finishing with fine
- Apply wood conditioner if using softwood species
- Apply stain, paint, or clear finish according to the manufacturer's instructions
- Allow full curing time before installation (typically 24-48 hours)
Step 8: Shelf Installation and Securing
- Carefully position the shelf on the installed brackets
- Check for level across the entire shelf length
- Mark bracket locations on the underside of the shelf
- Pre-drill and secure the shelf to the brackets using screws from underneath (optional for permanent installation)
- Install shelf stops or clips if needed to prevent sliding
Step 9: Final Inspection and Touch-up
- Load test the complete installation with actual items to be stored
- Check for any movement, sagging, or stress points
- Apply a touch-up finish to any screw holes or minor imperfections
- Clean all surfaces and remove any installation debris
Professional Installation Tips
Alignment Secrets from Professional Contractors:
- Create a cardboard template for consistent bracket spacing across multiple installations
- Use painter's tape to mark bracket positions before drilling - easily removable if adjustments needed
- Install the top shelf first when creating multi-shelf systems - easier access for precise positioning
- Take photos of bracket positions before shelf installation for future reference
Common Installation Challenges and Solutions:
- Uneven Walls: Use shims behind brackets to maintain level installation
- No Stud Availability: Use multiple heavy-duty toggle bolts rated for the required load
- Plaster Walls: Score around bracket outline with utility knife before drilling to prevent cracking
- Tiled Walls: Use carbide-tipped masonry bits and drill slowly to prevent tile cracking
Room-by-Room Open Shelving Solutions
Each room in your home presents unique opportunities and challenges for open shelving installation. Understanding room-specific requirements ensures both functional storage and aesthetic success.
Kitchen Open Shelving: Functional Storage Meets Design
Optimal Kitchen Shelf Placement:
- Upper Shelves (36-42" above counters): Everyday dishes, glasses, and frequently used items
- Lower Shelves (18-24" above counters): Coffee makers, toasters, and daily appliances
- Corner Installations: Maximize storage in traditionally wasted space
- Island Applications: Create breakfast bar storage and display areas
Recommended Industrial Farm Co Brackets for Kitchen Use:
- The Seneca Shelf Support for heavy appliances and dish storage - engineered angular design provides exceptional load capacity up to 80 pounds per pair
- The Lucas L Bracket for spice racks and lighter kitchen accessories - clean, minimalist lines complement modern kitchen aesthetics
Kitchen Shelf Material Recommendations:
- Butcher Block: Natural antibacterial properties, food-safe finish options
- Stainless Steel: Commercial-grade durability, easy sanitization, heat-resistant
- Sealed Hardwood: Water-resistant when properly finished, complements cabinetry
- Quartz Composite: Non-porous surface, consistent color, extremely durable
Kitchen Safety and Code Considerations:
- Maintain 18" minimum clearance above cooktops and ranges
- Use heat-resistant materials within 36" of cooking surfaces
- Install ground fault circuit interrupter (GFCI) protection for any electrical outlets
- Consider local building codes for commercial kitchen applications
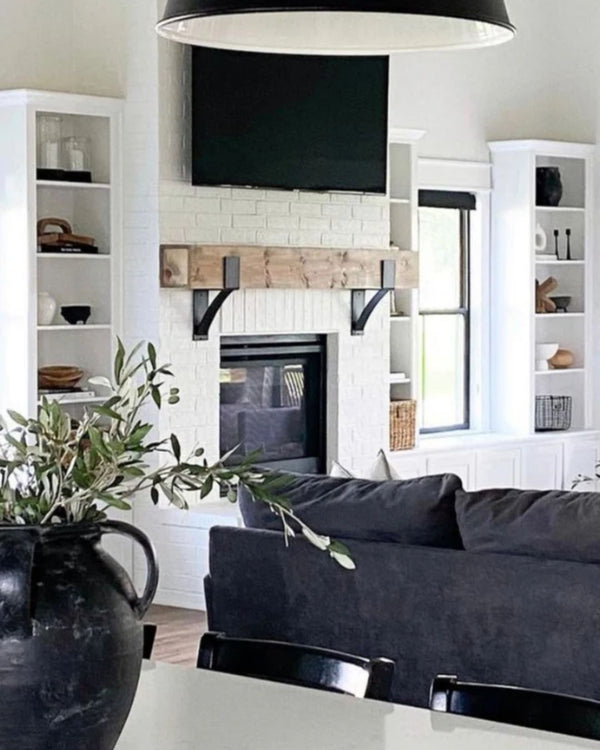
Living Room Display Shelving: Showcase Your Style
Living Room Shelf Design Principles:
- Eye-Level Focus: Install primary display shelves at 60-66" from the floor
- Furniture Integration: Coordinate shelf heights with existing furniture pieces
- Lighting Consideration: Plan for accent lighting to highlight displayed items
- Traffic Flow: Maintain clear pathways and avoid head-height obstacles
Recommended Brackets for Living Spaces:
- The Glimmerglass J Shelf Bracket for statement floating shelves - creates a dramatic visual impact with minimal hardware visibility
- The Lucas L Bracket in matte black finish for contemporary spaces - versatile design complements modern and transitional décor
Living Room Styling Applications:
- Book Display: Mix vertical and horizontal arrangements for visual interest
- Art Integration: Layer smaller artworks against the wall behind the shelf
- Plant Display: Incorporate live greenery for natural elements
- Personal Collections: Showcase meaningful objects while maintaining organization
Bathroom Storage Solutions: Moisture-Resistant Organization
Bathroom Shelf Placement Strategy:
- Above Toilet: Utilize vertical space for towel and supply storage
- Shower Alcoves: Built-in shelving for toiletries and bath accessories
- Vanity Areas: Open storage for daily grooming essentials
- Linen Closet Alternatives: Wall-mounted shelving when closet space is limited
Moisture-Resistant Bracket Options:
- The Jane J Style Shelf Brackets for towel and toiletry storage - compact profile perfect for smaller bathroom spaces
- The Glimmerglass J Shelf Bracket for larger bathroom statement shelves
Bathroom-Appropriate Materials:
- Cedar Wood: Natural moisture resistance and pleasant aromatic properties
- Teak: Marine-grade durability with natural water-repelling oils
- Sealed Bamboo: Sustainable option with antimicrobial properties
- Tempered Glass: Easy cleaning and completely moisture-proof
- Stainless Steel: Commercial durability with corrosion resistance
Humidity and Ventilation Considerations:
- Install an exhaust fan adequate for the room size to reduce moisture buildup
- Allow air circulation behind shelves to prevent mold and mildew
- Use marine-grade sealers on wood materials in high-humidity areas
- Consider heated towel bars integrated with shelving systems
Home Office Organization: Productivity Through Design
Office Shelf Configuration for Maximum Efficiency:
- Above Desk Level (84-96"): Reference materials and archived documents
- Desktop Level (30-36"): Frequently accessed files and supplies
- Below Desk (18-24"): Printer storage and equipment accessibility
- Corner Applications: Maximize storage in compact office spaces
Professional-Grade Bracket Selection:
- The Seneca Shelf Support heavy book collections and equipment storage
- The Lucas L Bracket for flexible modular office organization systems
Office Material Considerations:
- Solid Hardwood: Supports heavy book loads without sagging
- High-Grade Plywood: Cost-effective for large shelving installations
- Adjustable Systems: Allow reconfiguration as storage needs change
- Wire Management: Plan cable routing for electronic equipment storage
Bedroom Closet Alternatives: Open Wardrobe Solutions
Open Closet Design Elements:
- Hanging Rod Integration: Combine shelves with clothing hanging systems
- Drawer Alternative: Open bins and baskets for folded clothing storage
- Shoe Storage: Dedicated shelving for footwear organization
- Accessory Display: Beautiful storage for handbags, jewelry, and accessories
Bedroom Bracket Applications:
- The Lucas L Bracket for clothing and accessory organization
- The Jane J Style Shelf Brackets for lighter personal items and displays
Professional Shelf Styling Techniques and Design Principles
Transform functional storage into stunning visual displays using professional interior design principles. These techniques create magazine-worthy installations that enhance your home's aesthetic appeal.
Fundamental Design Principles for Open Shelving
Visual Balance and Weight Distribution:
- Symmetrical Balance: Mirror arrangements on either side of the center point
- Asymmetrical Balance: Use different objects of equal visual weight
- Color Distribution: Spread bright or dark colors evenly across the shelving
- Texture Variation: Combine smooth, rough, matte, and glossy surfaces
Scale and Proportion Guidelines:
- Rule of Thirds: Divide shelf space into three sections for pleasing proportions
- Height Variation: Use objects of varying heights to create visual rhythm
- Depth Layering: Place larger items behind smaller ones for dimension
- Negative Space: Leave 30-40% of shelf space unoccupied for a clean appearance
Color Theory Application:
- Monochromatic Schemes: Various shades of a single color for a sophisticated look
- Complementary Colors: Opposite colors on the color wheel for dynamic contrast
- Analogous Colors: Adjacent colors on the color wheel for a harmonious feel
- Neutral Base: Use 70% neutral colors with 30% accent colors for balance
Advanced Styling Techniques
The Triangle Technique: Create visual triangles with object arrangements - place one tall item and two shorter items to form invisible triangle shapes across your shelving display.
Repetition with Variation: Use similar objects (like vases or books) in different sizes, colors, or textures throughout your shelving to create cohesion while maintaining visual interest.
Layering Strategy:
- Background Layer: Wall-mounted art or decorative backing
- Middle Layer: Primary display items at various heights
- Foreground Layer: Small accent pieces and trailing plants
Seasonal Styling Rotation: Plan quarterly styling updates to keep displays fresh:
- Spring: Light colors, fresh flowers, renewal themes
- Summer: Bright colors, natural elements, outdoor inspiration
- Fall: Warm tones, harvest elements, cozy textures
- Winter: Cool colors, metallic accents, minimal clean lines
Room-Specific Styling Approaches
Kitchen Shelf Styling for Function and Beauty:
- Group items by function, but vary in height and color
- Display attractive staples in clear glass containers
- Incorporate live herbs for fresh color and practical use
- Mix everyday dishes with occasional decorative pieces
Living Room Curation Techniques:
- Create conversation starters with unique or meaningful objects
- Incorporate personal photos in cohesive frame styles
- Add books both for reading and visual weight
- Include plants for natural elements and air purification
Bathroom Spa Styling:
- Roll towels instead of folding for hotel-inspired luxury
- Use attractive containers for necessary toiletries
- Add a single fresh flower or a small plant for life
- Maintain clean lines with minimal decorative objects
Long-Term Maintenance and Care for Open Shelving Systems
Proper maintenance ensures your open shelving investment remains beautiful and functional for decades. Develop routine care habits to preserve both brackets and shelving materials.
Bracket Maintenance and Inspection
Monthly Maintenance Tasks:
- Dust brackets with a microfiber cloth or a soft brush
- Check for loose screws or mounting hardware
- Inspect for signs of stress, bending, or metal fatigue
- Wipe down with a slightly damp cloth for deeper cleaning
Annual Inspection Protocol:
- Remove all items from shelves for thorough inspection
- Check wall attachment points for any movement or loosening
- Inspect shelf material for warping, cracking, or wear
- Test weight capacity with gradually increasing loads
- Apply protective wax to raw steel finishes if desired
Preventive Care for Industrial Brackets:
- Avoid hanging items directly from brackets unless designed for such use
- Distribute weight evenly across the shelf surface
- Address any rust spots immediately with fine steel wool and touch-up finish
- Keep brackets dry - wipe away any moisture accumulation promptly
Wood Shelf Care and Refinishing
Daily and Weekly Care:
- Dust regularly with a microfiber cloth to prevent buildup
- Clean spills immediately to prevent staining or water damage
- Use coasters under plants, candles, and beverages
- Rotate displayed items periodically to prevent uneven fading
Quarterly Deep Cleaning:
- Use a wood cleaner appropriate for your specific finish type
- Check for signs of wear in high-traffic areas
- Apply wood conditioner to maintain the moisture content
- Address any scratches or dings with appropriate repair techniques
Annual Refinishing Schedule:
- Natural Oil Finishes: Reapply every 12-18 months
- Polyurethane Finishes: Refresh every 3-5 years, depending on wear
- Paint Finishes: Touch up annually, full repaint every 5-7 years
- Stain Applications: May need refreshing every 3-4 years in high-use areas
Environmental Factors and Protection
Humidity Control:
- Maintain 30-50% relative humidity to prevent wood movement
- Use dehumidifiers in basements and high-moisture areas
- Install humidifiers in dry climates or during the winter heating season
- Monitor wood shelves for seasonal expansion and contraction
Temperature Considerations:
- Avoid installing shelves near heat sources like radiators or fireplaces
- Use curtains or blinds to protect from direct sunlight
- Allow for thermal expansion in metal brackets during temperature changes
- Consider seasonal adjustments in areas with extreme temperature variations
Light Protection:
- Rotate books and displayed items to prevent uneven fading
- Use UV-filtering window treatments in rooms with extensive sun exposure
- Consider museum-quality LED lighting to minimize heat and UV damage
- Position the most valuable or fade-sensitive items away from direct light
Common Open Shelving Mistakes to Avoid
Learning from common installation and design mistakes saves time, money, and frustration. These frequently encountered problems are easily preventable with proper planning.
Installation Errors and Solutions
Inadequate Wall Attachment:
- Mistake: Using insufficient or incorrect anchors for the wall type and load
- Solution: Always use fasteners rated for 3x your intended load capacity
- Prevention: Consult load rating charts and test anchors before full installation
Poor Level and Alignment:
- Mistake: Rushing through the layout phase results in crooked or misaligned shelves
- Solution: Invest time in careful measurement and use quality levels throughout the process
- Prevention: Create templates and use laser levels for multiple shelf installations
Incorrect Bracket Spacing:
- Mistake: Spacing brackets too far apart causes sagging and potential failure
- Solution: Follow manufacturer guidelines and consider your specific load requirements
- Prevention: Calculate load per linear foot and select appropriate bracket spacing
Design and Aesthetic Missteps
Overcrowding and Visual Clutter:
- Mistake: Filling every available space creates a chaotic, overwhelming appearance
- Solution: Follow the 60-40 rule - 60% displayed items, 40% negative space
- Prevention: Edit ruthlessly and choose quality over quantity for displays
Inconsistent Styling Approach:
- Mistake: Random mixture of colors, styles, and objects without a cohesive theme
- Solution: Develop a color palette and style guidelines before arranging items
- Prevention: Create a mood board or inspiration photos to guide styling decisions
Ignoring Room Function and Flow:
- Mistake: Installing shelves that interfere with daily activities or traffic patterns
- Solution: Consider how the room is used and maintain clear pathways
- Prevention: Live in space and observe usage patterns before finalizing shelf locations
Material and Finish Incompatibilities
Mismatched Hardware Finishes:
- Mistake: Mixing different metal finishes without an intentional design plan
- Solution: Stick to 2-3 coordinating finishes maximum throughout the space
- Prevention: Inventory existing hardware before selecting new bracket finishes
Inappropriate Material Selection:
- Mistake: Using moisture-sensitive materials in high-humidity areas
- Solution: Choose materials appropriate for specific room conditions
- Prevention: Research material properties and environmental requirements during planning
Inadequate Weight Capacity Planning:
- Mistake: Underestimating the actual weight of items to be stored
- Solution: Weigh actual items or similar objects before bracket selection
- Prevention: Plan for potential future storage needs, not just current requirements
Troubleshooting Guide for Open Shelf Problems
Even well-installed open shelving systems may develop issues over time. This troubleshooting guide helps identify and resolve common problems quickly and effectively.
Structural Issues and Repairs
Sagging Shelves:
- Possible Causes: Overloading, inadequate bracket spacing, and shelf material too thin
- Immediate Solutions: Remove excess weight, add a support bracket in the center
- Long-term Fixes: Replace with thicker shelf material or reduce bracket spacing
- Prevention: Calculate load capacity during the initial planning phase
Loose or Pulling Brackets:
- Possible Causes: Wall deterioration, inadequate anchors, vibration over time
- Immediate Solutions: Check and tighten all fasteners, add washers for better distribution
- Long-term Fixes: Replace with larger anchors or relocate to wall studs
- Prevention: Annual inspection and maintenance schedule
Wall Damage Around Brackets:
- Possible Causes: Oversized holes, water damage, and settling foundation movement
- Immediate Solutions: Fill holes with appropriate patching compound
- Long-term Fixes: Relocate brackets to undamaged wall areas
- Prevention: Use proper drill bit sizes and protect walls from moisture
Aesthetic Problems and Solutions
Uneven Spacing or Alignment:
- Diagnosis: Use a long level to check horizontal and vertical alignment
- Minor Adjustments: Loosen brackets and reposition using measurement guides
- Major Corrections: May require complete reinstallation with a new layout
- Tools Needed: Level, measuring tape, stud finder, pencil
Finish Deterioration:
- Wood Issues: Fading, scratches, water rings, or general wear
- Metal Issues: Rust spots, finish chips, or corrosion
- Repair Options: Spot refinishing, complete refinishing, or replacement
- Maintenance Schedule: Regular cleaning and protective treatments
Style Inconsistencies:
- Common Problems: Clashing colors, conflicting styles, poor proportions
- Design Solutions: Develop a cohesive color scheme, edit displays, and improve lighting
- Professional Help: Consider an interior design consultation for major issues
Performance Optimization
Maximizing Storage Capacity:
- Add vertical dividers for books and similar items
- Incorporate storage boxes and baskets for smaller objects
- Use shelf risers to create additional levels
- Install hooks underneath shelves for hanging storage
Improving Accessibility:
- Reorganize frequently used items to convenient heights
- Add a step stool storage for accessing higher shelves
- Install pull-out drawers or bins for deep shelves
- Consider lighting improvements for visibility
Enhancing Stability:
- Add anti-tip devices for tall or narrow shelving units
- Install wall anchors at the top of tall shelf systems
- Use shelf liner materials to prevent items from sliding
- Consider seismic safety measures in earthquake-prone areas
Advanced Open Shelving Techniques
Take your open shelving installation to a professional level with these advanced techniques used by interior designers and custom contractors.
Integrated Lighting Systems
LED Strip Lighting Installation:
- Install LED strips underneath each shelf for accent lighting
- Use warm white (2700K-3000K) for cozy ambiance
- Include dimmer controls for adjustable brightness levels
- Hide transformers and controls inside nearby cabinetry
Recessed Lighting Coordination:
- Plan recessed lights to highlight specific shelf areas
- Use narrow beam angle spotlights for dramatic effect
- Consider adjustable track lighting for flexible highlighting
- Coordinate with natural light sources for balanced illumination
Battery-Operated Solutions:
- Wireless LED puck lights for rental properties or difficult installations
- Motion-activated lights for convenience in dark areas
- Remote-controlled systems for easy operation
- Solar-charged options for environmentally conscious applications
Custom Bracket Fabrication
Modified Standard Brackets:
- Drill additional mounting holes for specific applications
- Add custom powder coating for exact color matching
- Weld extensions or modifications for unique requirements
- Create hybrid designs combining multiple bracket styles
Completely Custom Designs:
- Work with local metalworkers for one-of-a-kind brackets
- Incorporate family initials, logos, or decorative elements
- Design brackets that double as art pieces or architectural details
- Create modular systems that can be reconfigured over time
Advanced Installation Techniques
Floating Shelf Systems:
- Use hidden rod systems for completely invisible support
- Router channels in shelf backs for concealed mounting hardware
- Create an illusion of shelves growing from the wall surface
- Incorporate cable management for electronic device storage
Adjustable Height Systems:
- Install vertical track systems for repositionable brackets
- Use standards and brackets for commercial-grade flexibility
- Plan wire management for adjustable electronic device storage
- Consider load capacity changes with different bracket positions
Multi-Wall Corner Systems:
- Design continuous shelving around room corners
- Calculate load distribution across multiple wall surfaces
- Plan for building a settlement and seasonal movement
- Coordinate bracket placement with room architectural features
Cost Analysis and ROI for Open Shelving Projects
Understanding the financial investment and return on investment helps homeowners make informed decisions about open shelving installations.
Project Cost Breakdown
(Disclaimer: These costs depend on your location and availability in your region)
Basic Single-Wall Installation (3 shelves, 8 feet total):
- Industrial Farm Co Brackets (6 pieces): $63-$105
- Wood shelving material: $75-$200
- Installation hardware and fasteners: $25-$50
- Professional installation (optional): $200-$400
- Total Project Cost: $163-$755
Mid-Range Multi-Wall System (8-12 shelves):
- Brackets and hardware: $200-$350
- Premium wood or engineered materials: $300-$600
- Custom finishing and staining: $100-$250
- Professional design consultation: $150-$300
- Total Project Cost: $750-$1,500
High-End Custom Installation (15+ shelves, integrated lighting):
- Custom brackets and specialized hardware: $500-$1,000
- Premium materials (hardwood, stone, glass): $800-$2,000
- Integrated lighting systems: $300-$800
- Professional design and installation: $1,000-$2,500
- Total Project Cost: $2,600-$6,300
Return on Investment Analysis
Property Value Impact:
- Open shelving increases home value by 3-8% in kitchens
- Living room installations add 2-5% to property valuation
- Well-designed systems sell homes 15-25% faster than comparable properties
- Investment recovery rate: 65-85% upon resale
Functional Value Benefits:
- Replaces the need for additional furniture storage ($500-$2,000 savings)
- Increases usable space efficiency by 20-30%
- Reduces time spent searching for items (estimated $200/year time value)
- Energy savings through improved organization and accessibility
Long-Term Durability Value:
- Industrial Farm Co brackets: 25+ year lifespan with proper maintenance
- Quality wood shelving: 15-20 year service life
- Maintenance costs: $50-$100 annually for cleaning and minor repairs
- The total cost of ownership is significantly lower than cabinet replacement
Frequently Asked Questions: